Intro
本贴记录在 Week 1 中落实的系列 Lab
Hint
Docker
相关问题在此贴中讨论:problems with docker
Labs Menu
Lab 1 - 1 Misc of Internet
Will be about things of url, host, ip, dns, etc. And series of tools to access the internet.
Should learn how to get webpage by curl/telnet, get hostname and coresponding ip with nslookup, and so on.
Build a basic top-down knowledge about the internet.
Lab 1 - 2 Build your own Rust Web Application
Practice with Actix-web. Build web application with human-friendly API.
Lab 1 - 3 Build your own TCP C/S Application
Practice with Rust standard library.
Lab 1 - 4 Hello Docker!
Lab 1 - 5 (Optional) Misc of Web Application
- OpenAPI 3
Many tools support making query or mock the Restful API with document of OpenAPI 3 like swagger editor or plugins in vscode. ( API Blueprint is an alternative but it is personally considered bugging and lack of standard )
- S3 Storage
1 个赞
Lab 1 - Practice web app with docker
Step 1 Run your own web app with Actix-web
Hint
- 你应该知道 cargo 的用法,包括如何添加第三方包
- 看看这个简单好用的库!actix.rs
Goal
达成效果:
~ curl localhost:8888/hello
Hello World!
Example 示例代码
use actix_web::{get, web, HttpResponse, Responder};
use actix_web::{App, HttpServer};

#[get("/hello")]
async fn index() -> impl Responder {
    HttpResponse::Ok().body("Hello world!")
}

#[actix_web::main]
async fn main() -> std::io::Result<()> {
    HttpServer::new(|| {
        App::new()
            .service(index)
            .service(echo)
    })
    .bind("0.0.0.0:8888")?
    .run()
    .await
}
Step 2 Build a simple echo http server with Actix-web
Hint
Goal
你应该可以通过命令
curl localhost:8888/echo/your_name
获得效果
~ curl localhost:8888/echo/your_name
Hello your_name!
Step 3 Add CORS support for your web application
Hint
Goal
后续允许使用 Swagger UI 访问你的应用,使用 permissive 功能即可
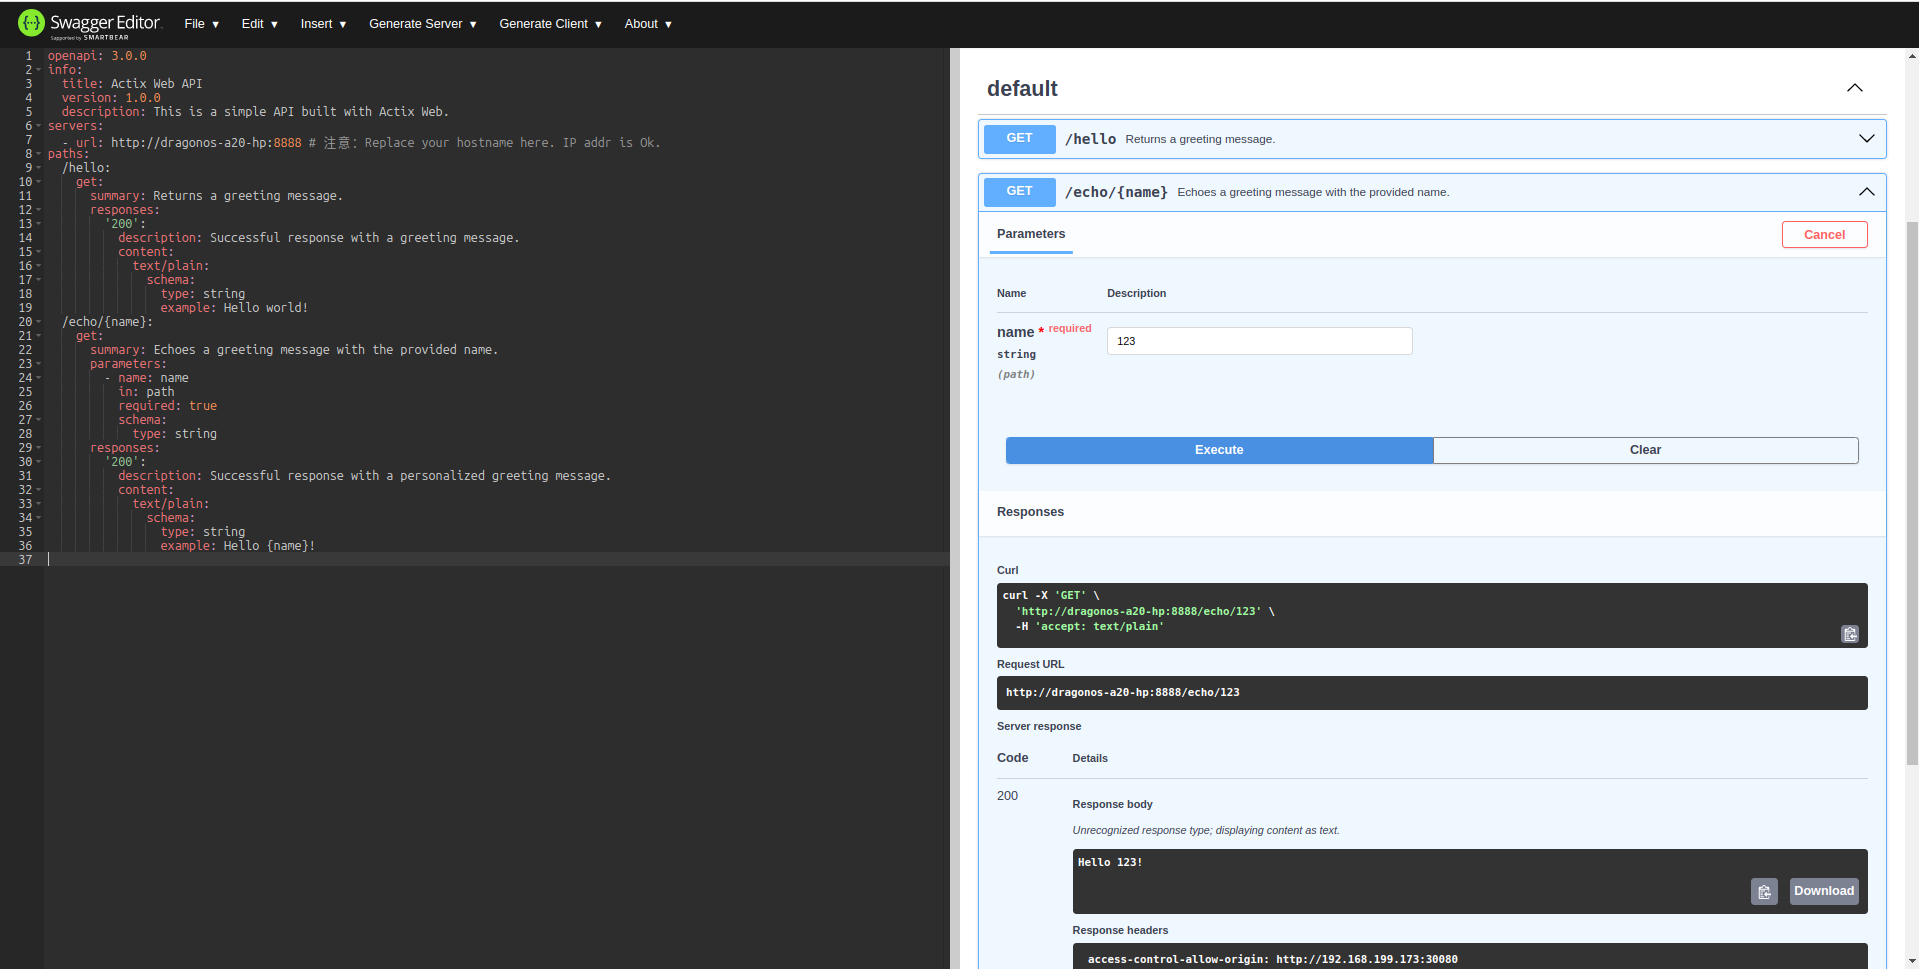
Step 4 Swagger for smart checking your Restful API
Deploy a Swagger Editor
一个用于测试你的API的应用,部署于 docker 上
docker pull swaggerapi/swagger-editor
docker run -d -p 8080:8080 swaggerapi/swagger-editor
访问 http://localhost:8080 即可看到界面
Edit your own OpenAPI document
使用 OpenAPI3 文档来定义你的“Hello world”请求。
这里提供一份示例API文档
思考 为什么需要将容器内 swagger 应用调取的主机名设置为本机的外部 IP/主机名?
openapi: 3.0.0
info:
  title: Actix Web API
  version: 1.0.0
  description: This is a simple API built with Actix Web.
servers:
  - url: http://dragonos-a20-hp:8888 # 注意:Replace your hostname here. IP addr is Ok.
paths:
  /hello:
    get:
      summary: Returns a greeting message.
      responses:
        '200':
          description: Successful response with a greeting message.
          content:
            text/plain:
              schema:
                type: string
                example: Hello world!
  /echo/{name}:
    get:
      summary: Echoes a greeting message with the provided name.
      parameters:
        - name: name
          in: path
          required: true
          schema:
            type: string
      responses:
        '200':
          description: Successful response with a personalized greeting message.
          content:
            text/plain:
              schema:
                type: string
                example: Hello {name}!
Goal 最终成果
Lab 2 Encapsulate (封装) Rust Application into Docker image
将写好的Rust程序打包成 Docker 镜像
Click above to learn about build rust application with docker. The official example seems not really clear about the Dockerfile. Here write a simple example that quickly introduce how to create rust app but reduce the final image size in a most simple way.
Simple Guide Making a Rust App Image
Step 1 Write the Dockerfile
在你的软件包根目录下添加 Dockerfile :
# Image pre-built from the official Rust image
# base on the Debian Bullseye slim image
FROM rust:1.83.0-slim-bullseye AS base

# Copy the source code and the Cargo.toml file
COPY ./Cargo.toml ./Cargo.toml
COPY ./src ./src
RUN cargo build --release

# Image to run the final binary
FROM debian:bullseye-slim

# It's usual to set the working directory to /app
WORKDIR /app

# Only copy the final binary from the build stage
# The binary is located at /app/target/release/example-actix-helloworld,
#   since we are using the release profile.
COPY --from=base /target/release/example-actix-helloworld /app/example-actix-helloworld

# Finally, we run the binary
CMD ["./example-actix-helloworld"]
此例子仅用于展示 Dockerfile 一部分工作原理,更多关于 Dockerfile 请查看文档 Dockerfile Reference 。注意,在这里,你应该将 example-actix-helloworld 替换为你的软件包名(在Cargo.toml中显示)。
在这里,我们首先使用了一个包含了 Rust 编译环境的基于Debian的镜像来编译我们的二进制程序,以保证其与后面不包含编译环境的、较小的Debian镜像可以二进制兼容。拷贝必要的源码,执行构建,然后直接将二进制程序拷贝进后者中运行,这就是这个 Dockerfile 做的事情。
Step 2 Build the Docker Image
软件包根目录下执行下面代码
docker buildx build -t actix-example:v0.1 .
-t 可任意自定义名称
-t, --tag stringArray
Name and optionally a tag (format: “name:tag”)
Step 3 Run the Image
docker run -p 8888:8888 actix-example:v0.1
-p [本机端口号]:[容器内端口号]
现在会在前台卡住,实际上就是已经在运行啦!尝试 curl 一下吧
Go Further
编译优化
不知道有没有发现,当修改了源码后,重新构建镜像,他会把所有crate重新下载一边编译!这很慢!为了优化这个,可进一步参考:
Best practice Dockerfile for speedy Rust builds
更多运行参数
尝试 docker run 增加 -d 参数,他直接返回到了命令行,为什么?docker ps 看看?
完整命令
docker run -d -p 8888:8888 actix-example:v0.1
容器网络互访
容器实例默认启动在 bridge 网络上,分配有一般是 172.17.x.x 的网络。尝试不通过端口映射,直接在 bridge 网络中让 Swagger Editor 访问你的 Web App!
2 个赞