实验内容:将rust应用封装进docker镜像
实验结果:
总结反思:
# Image pre-built from the official Rust image
# base on the Debian Bullseye slim image
FROM rust:1.83.0-slim-bullseye AS base

# Copy the source code and the Cargo.toml file
COPY ./Cargo.toml ./Cargo.toml
COPY ./src ./src
RUN cargo build --release

# Image to run the final binary
FROM debian:bullseye-slim

# It's usual to set the working directory to /app
WORKDIR /app

# Only copy the final binary from the build stage
# The binary is located at /app/target/release/example-actix-helloworld,
#   since we are using the release profile.
COPY --from=base /target/release/example-actix-helloworld /app/example-actix-helloworld

# Finally, we run the binary
CMD ["./example-actix-helloworld"]
对于教程的Dockerfile文件,其中的base是“AS base",一开始没有注意到,理解错了,conda的base是本地 
代码附录:
use actix_web::{get,web,Result};
use actix_cors::Cors;
use actix_web::http::header;
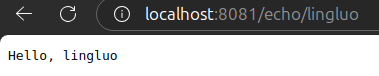
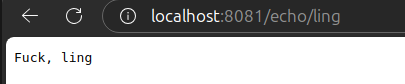
#[get("/echo/{user_name}")]
async fn echo(path: web::Path<String>)-> Result<String>{
let user_name=path.into_inner();
return Ok(format!("Hello, {}",user_name));
}
#[actix_web::main]
async fn main() -> std::io::Result<()>{
use actix_web::{App,HttpServer};
HttpServer::new(|| {
let cors = Cors::default()
.allow_any_origin()
.allowed_methods(vec!["GET", "POST"])
.allowed_headers(vec![header::AUTHORIZATION, header::ACCEPT])
.allowed_header(header::CONTENT_TYPE);
App::new()
.wrap(cors)
.service(echo)
})
.bind(("0.0.0.0", 8081))?
.run()
.await
}
补充(尝试其他参数):
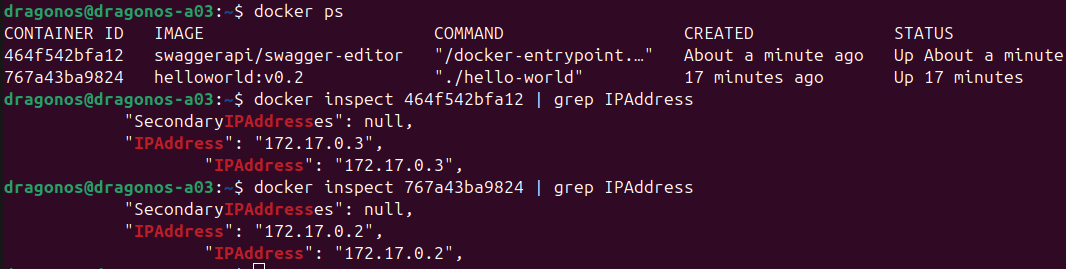
docker run 增加 -d 参数为在后台运行容器,通过docker ps可以查看到
补充(解决源码修改后,重新构建镜像时间开销大):
问题所在:
不修改源码的run build again不会导致时间开销增大很多,因为docker has cached all intermediate build artifacts,但是修改源码发生在RUN cargo build --release之前,所以需要重新执行build,重新下载和安装所有包,时间开销增大。
参考文章:https://depot.dev/blog/rust-dockerfile-best-practices
基本思想:
将整个任务拆分隔离,避免对于编译完成的并且不需要修改的dependencies进行rebuilt,即add more FROM satements to create a mutile-stage build
修改教程的Dockerfile:
(注: 这里直接使用了教程的optimization3)
详情请看代码注释:
# Image pre-built from the official Rust image
# base on the Debian Bullseye slim image
FROM rust:1.83.0-slim-bullseye AS base
RUN apt-get update && apt-get install -y pkg-config libssl-dev
# sccache will cache individual compilation artifacts so that they can be reused.
# This allows you to recompile individual dependencies only when needed.
RUN cargo install sccache
# # cargo-chef will analyse the dependencise of the project and create a recipe(配方)
# # which will cache the dependencies and the build artifacts that are not changed.
# # so that,only the changed dependencies will be recompiled.
RUN cargo install cargo-chef
# # Set the environment variables for sccache
# # this means that when running cargo build, the sccache will run as a wrapper for rustc
# # and the cache will be stored in the /sccache directory
ENV RUSTC_WRAPPER=sccache SCCACHE_DIR=/sccachge


FROM base AS planner
WORKDIR /app
COPY . .
# cache cargo registry and sccache directory
RUN --mount=type=cache,target=/usr/local/cargo/registry \
    --mount=type=cache,target=$SCCACHE_DIR,sharing=locked \
    cargo chef prepare --recipe-path recipe.json


FROM base AS builder
WORKDIR /app
COPY --from=planner /app/recipe.json recipe.json
RUN --mount=type=cache,target=/usr/local/cargo/registry \
    --mount=type=cache,target=$SCCACHE_DIR,sharing=locked \
    cargo chef cook --release --recipe-path recipe.json
COPY . .
RUN --mount=type=cache,target=/usr/local/cargo/registry \
    --mount=type=cache,target=$SCCACHE_DIR,sharing=locked \
    cargo build  --release


# # Image to run the final binary
FROM debian:bullseye-slim

# # It's usual to set the working directory to /app
WORKDIR /app

# # Only copy the final binary from the build stage
# # The binary is located at /app/target/release/example-actix-helloworld,
# #   since we are using the release profile.
COPY --from=builder /app/target/release/hello-world /app/hello-world

# Finally, we run the binary
CMD ["./hello-world"]
实验结果:
(注:没有验证时间具体快多少,因为肉眼可见的快OVO)
1 个赞